Creating a Gmail “send as” address
Want to send emails from another address using Gmail’s interface, but having trouble linking addresses? Auth-Email has you covered!
This guide walks you through setting up a “send as” address in Gmail, so Gmail uses Auth-Email as the SMTP server — perfect for sending as [email protected], [email protected], or any address you have linked with Auth-Email.
Before you begin
You’ll need the following:
- A Gmail or Google Workspace account
- An Auth-Email account, and an active subscription to the Starter or Personal plan
- An account set up in Auth-Email (see our getting started guide if needed)
- SMTP server details from the Auth-Email dashboard for the sender account
Step 1: Add the “send as” address in Gmail
- In Gmail, go to “⚙️ Settings > See all settings”
- Click the “Accounts and Import” tab
- Under “Send mail as, click “Add another email address”. Alternatively, if you are editing an existing address, click “edit info” next to the address you want to update.
- Complete the form in the popup window:
- “Name”: What you want recipients to see (e.g.,
Support Team) - “Email address”: The email you want to send from (e.g.,
[email protected]) - Uncheck “Treat as an alias” (this prevents recipients seeing the Gmail account address)
- “Name”: What you want recipients to see (e.g.,
- Click “Next Step”
Step 2: Configure SMTP settings in Gmail
Visit your Auth-Email dashboard and locate the SMTP settings for your account. Keep this page open for reference.
In the Gmail popup window, enter the account’s SMTP settings. The following table shows the configuration for an account provided by Outlook:
| Setting | Value |
|---|---|
| SMTP Server | outlook.auth-email.com |
| Port | 465 |
| Username | Your full email address (e.g., [email protected]) |
| Password | (chosen during Auth-Email account setup) |
| Secured connection | ✅ Yes, using SSL |
You can always find the correct settings for your specific email account and provider in the Auth-Email dashboard. Here’s what the configuration page looks like in Gmail with the settings filled in for a Hotmail account:
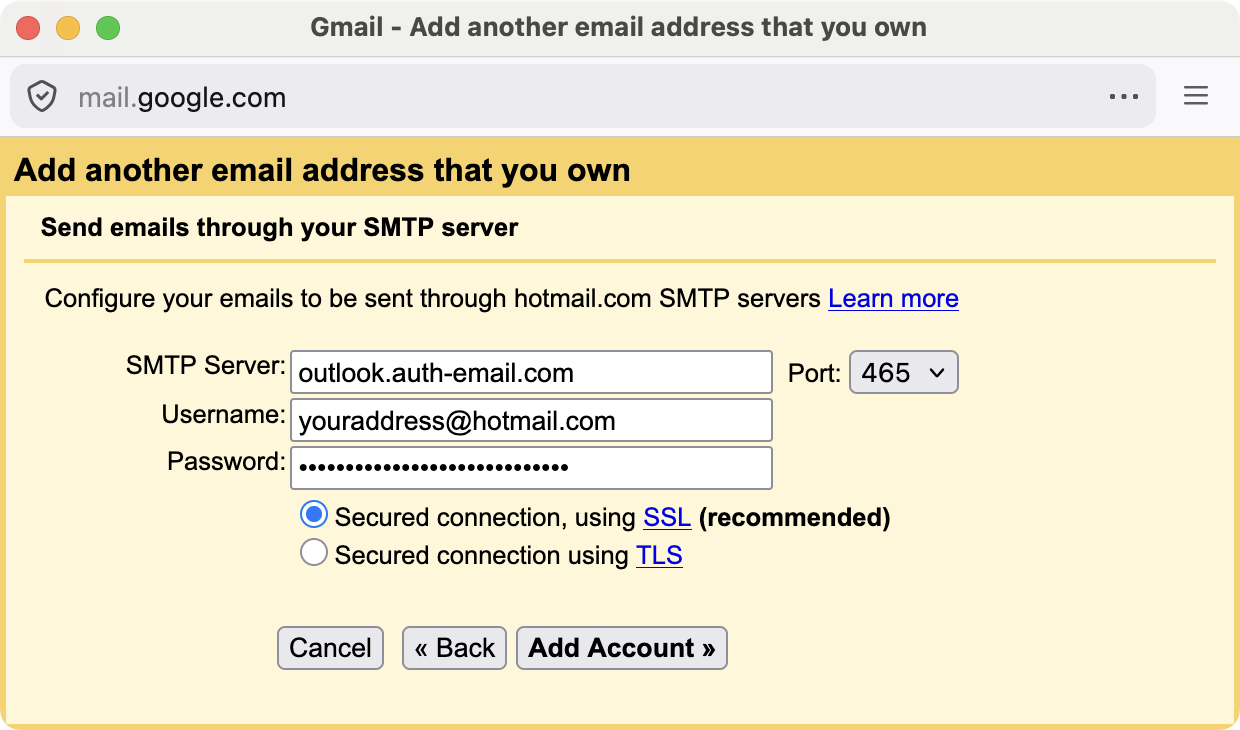
Once you’ve entered and checked all the settings, click “Add Account” (or “Save Changes” if you’re editing an existing account).
Step 3: Complete Gmail verification
If you’re adding a new account, Gmail will now send a confirmation email to your linked address. If you’re editing an existing address, you can skip this step.
To verify the new address:
- Open your inbox (either directly in your provider’s webmail service, or using IMAP/POP via Auth-Email)
- Click the confirmation link, or enter the code in Gmail’s popup window
Once verified, Gmail will let you choose the external address in the “From” field when composing new messages.
Test your setup
- Compose a new email in Gmail
- Use the dropdown next to the “From” field to select your linked address
- Send a test email
- Verify that the email arrives in the inbox of the address you sent it to, and that it appears as sent from the “send as” address
💡 Need help?
If you run into any issues, please reach out to us at [email protected] — we’ll help you get things working.